Making gluten-free sourdough bread is possible, and the results can be just as delicious as traditional sourdough. Here’s a simple recipe you can try, including instructions for a gluten-free sourdough starter, as that’s a key element to getting the tangy, fermented flavor of sourdough.
Gluten-Free Sourdough Starter
You’ll need to create a gluten-free sourdough starter from scratch. It usually takes about 5–7 days to develop, so plan accordingly.
Ingredients:
- 100g gluten-free flour (brown rice flour, sorghum, or a gluten-free flour blend works well)
- 100g filtered water (room temperature)
- A pinch of salt (optional)
Instructions:
- Day 1:
- In a clean jar or bowl, mix 100g gluten-free flour with 100g filtered water. Stir until you get a thick, paste-like consistency.
- Cover the jar loosely with a lid or a cloth, leaving some room for air to flow in. Let it sit at room temperature (around 70°F or 21°C) for 24 hours.
- Day 2–3:
- On the second day, you’ll likely see some bubbles starting to form. If not, don’t worry; just continue with the feeding process.
- Discard half of the starter and feed it with another 100g of gluten-free flour and 100g filtered water.
- Stir, cover loosely, and let it sit for another 24 hours.
- Day 4–7:
- Continue the process of discarding half and feeding the starter once a day. You should start to notice more bubbles and the starter will begin to smell sour, indicating that it’s fermenting and maturing.
- By day 5 or 7, your starter should be strong, bubbly, and ready to use.
Gluten-Free Sourdough Bread Recipe
Ingredients:
- 1 cup gluten-free sourdough starter (fed and active)
- 2 ½ cups gluten-free flour (a mix of rice flour, sorghum, and potato starch works well)
- 1 ¼ cups water (room temperature)
- 2 tbsp olive oil
- 1 tbsp honey or sugar (optional, helps with fermentation)
- 1 tsp salt
- 1 tsp xanthan gum (helps with the bread’s structure)
- ½ tsp baking soda (helps with rise)
Instructions:
- Activate the Starter:
- If your starter is refrigerated, remove it from the fridge 4-6 hours before using. Feed it once or twice to get it bubbly and active.
- Mix the Dough:
- In a large bowl, combine the gluten-free flour, xanthan gum, salt, and baking soda.
- Add the starter, water, olive oil, and honey/sugar. Mix everything until fully incorporated. The dough will be more like a thick batter than a traditional dough.
- First Rise:
- Cover the bowl with a damp towel or plastic wrap. Let it rise in a warm place for 4-6 hours, or until it has visibly puffed up and increased in size (it may not double in size, but it should be aerated).
- Shape the Bread:
- Grease a loaf pan (9×5 inch) or line it with parchment paper. Transfer the dough into the pan and smooth out the top with a spatula.
- Second Rise:
- Let the dough rise again for 1-2 hours. It should puff up a little, but gluten-free dough doesn’t rise as much as traditional dough.
- Bake:
- Preheat the oven to 375°F (190°C). Once the dough has risen, place it in the preheated oven.
- Bake for 40-45 minutes or until the top is golden brown and a toothpick inserted into the center comes out clean.
- Cool:
- Let the bread cool completely before slicing. Gluten-free bread tends to be a little crumbly when freshly baked, so it’s best to let it cool thoroughly before cutting.
Notes:
- Flour Blend: You can make your own gluten-free flour blend or buy a pre-made one. A blend of brown rice flour, sorghum flour, and tapioca starch is commonly used in gluten-free baking.
- Sourdough Flavor: The flavor will be milder than traditional sourdough due to the absence of gluten, but the tangy taste from the starter will still be present.
- Storage: Store gluten-free sourdough bread in an airtight container at room temperature for up to 3 days, or freeze it for longer storage.
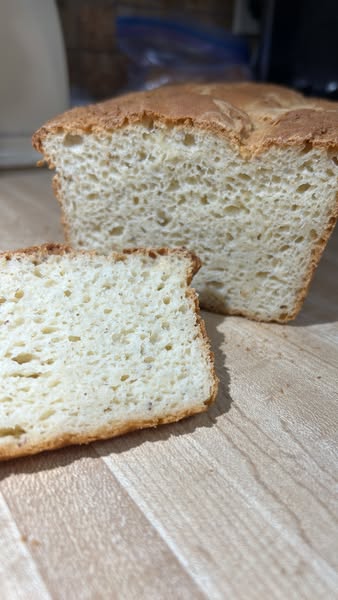
Enjoy your gluten-free sourdough! If you want to try variations, you can add herbs, seeds, or other flavorings to the dough.